


About 6 years ago, I became gluten free out of desperation to find out what was causing my debilitating sinus infections. Four weeks into this new lifestyle, not only were my sinus problems seemingly healed, but I saw a multitude of positive repercussions from cutting gluten out of my diet. If you have a similar story, then these empanadas will rock your world! OR maybe you are a breastfeeding mom who is experiencing some allergies with your little one and needing to cut out gluten and dairy for just this season! This recipe will make food exciting again!
Being gluten free has increased my appreciation for the art of cooking. I get dinner ideas by browsing various recipes on the internet and then I end up making my own versions. When I hit jackpot with a new recipe I have created, I am eager to share! So when Dr. Micaela asked if I wanted to participate in the blog, I jumped at the opportunity to share these crowd-pleasing empanadas.
Aside from being gluten free, I also see a big improvement in daily life through avoiding inflammatory foods. This recipe contains all good foods and can even contain no dairy through only one little swap.
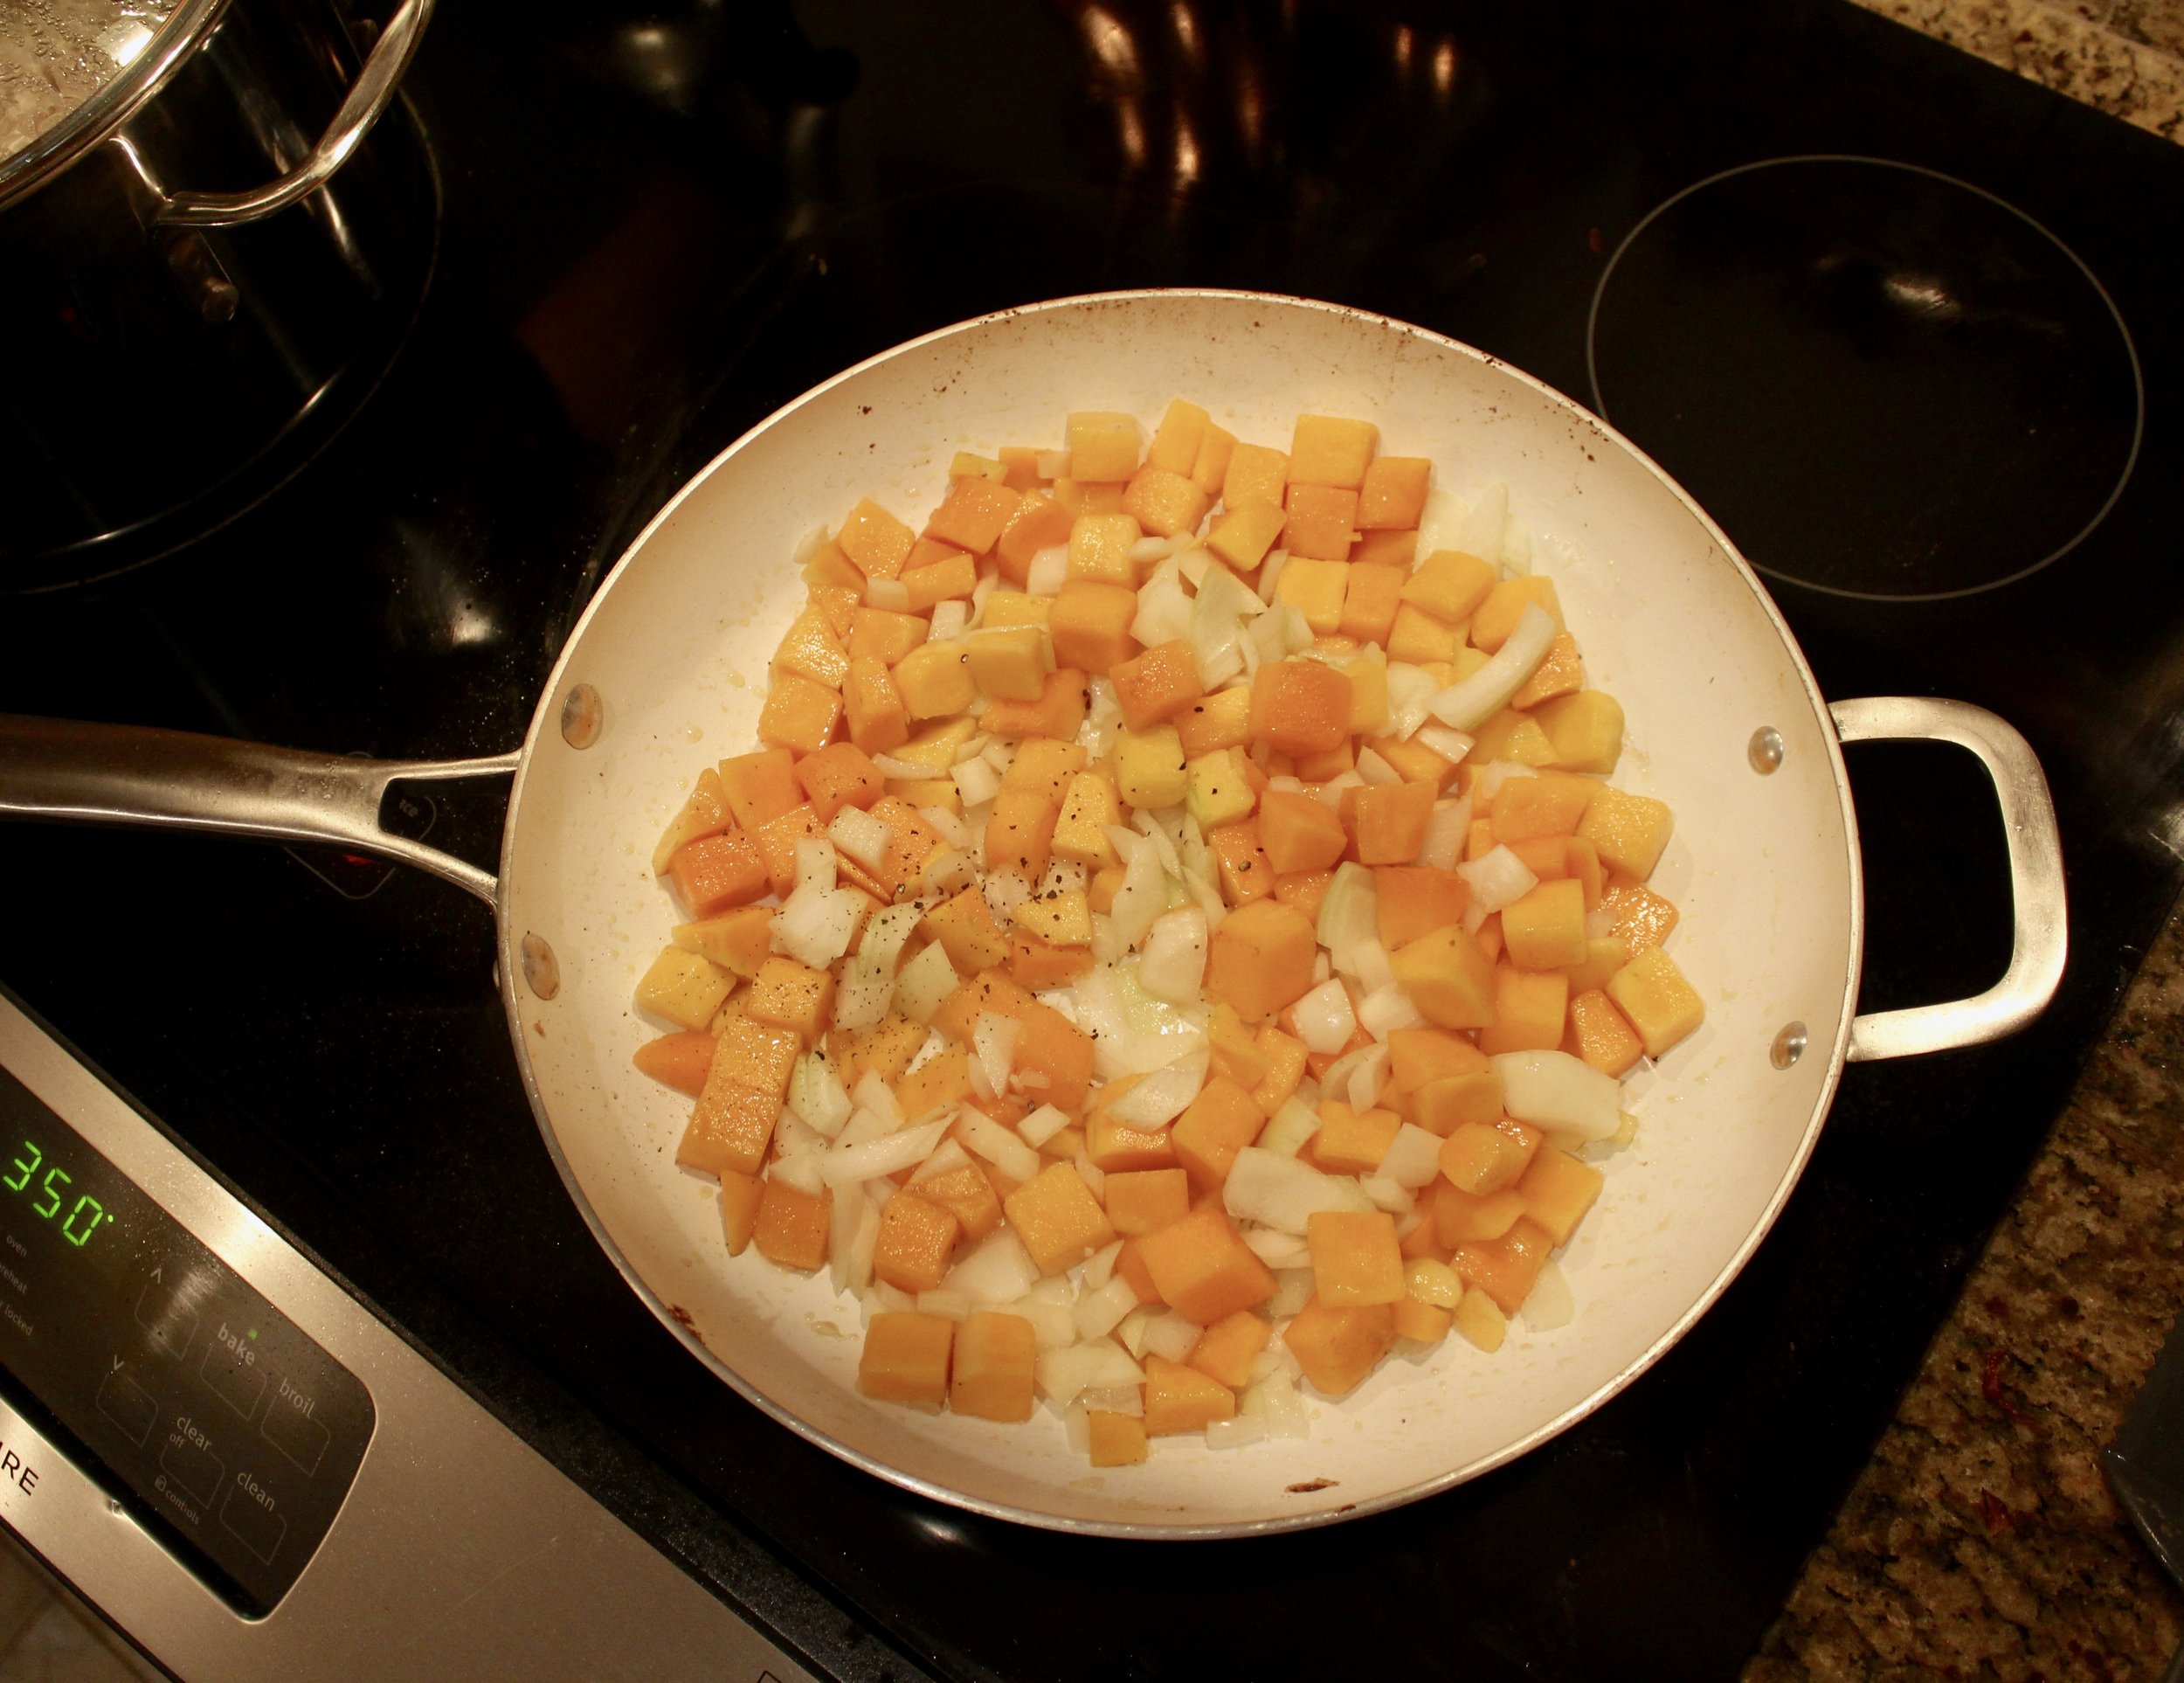
Preheat your oven to 350 degrees. Start by making your filling. Saute cubed butternut squash with diced onions until both are soft and onions are translucent. Add thyme and garlic once things are softened and cook for only a few minutes. I usually add salt/pepper and garlic powder at this step.
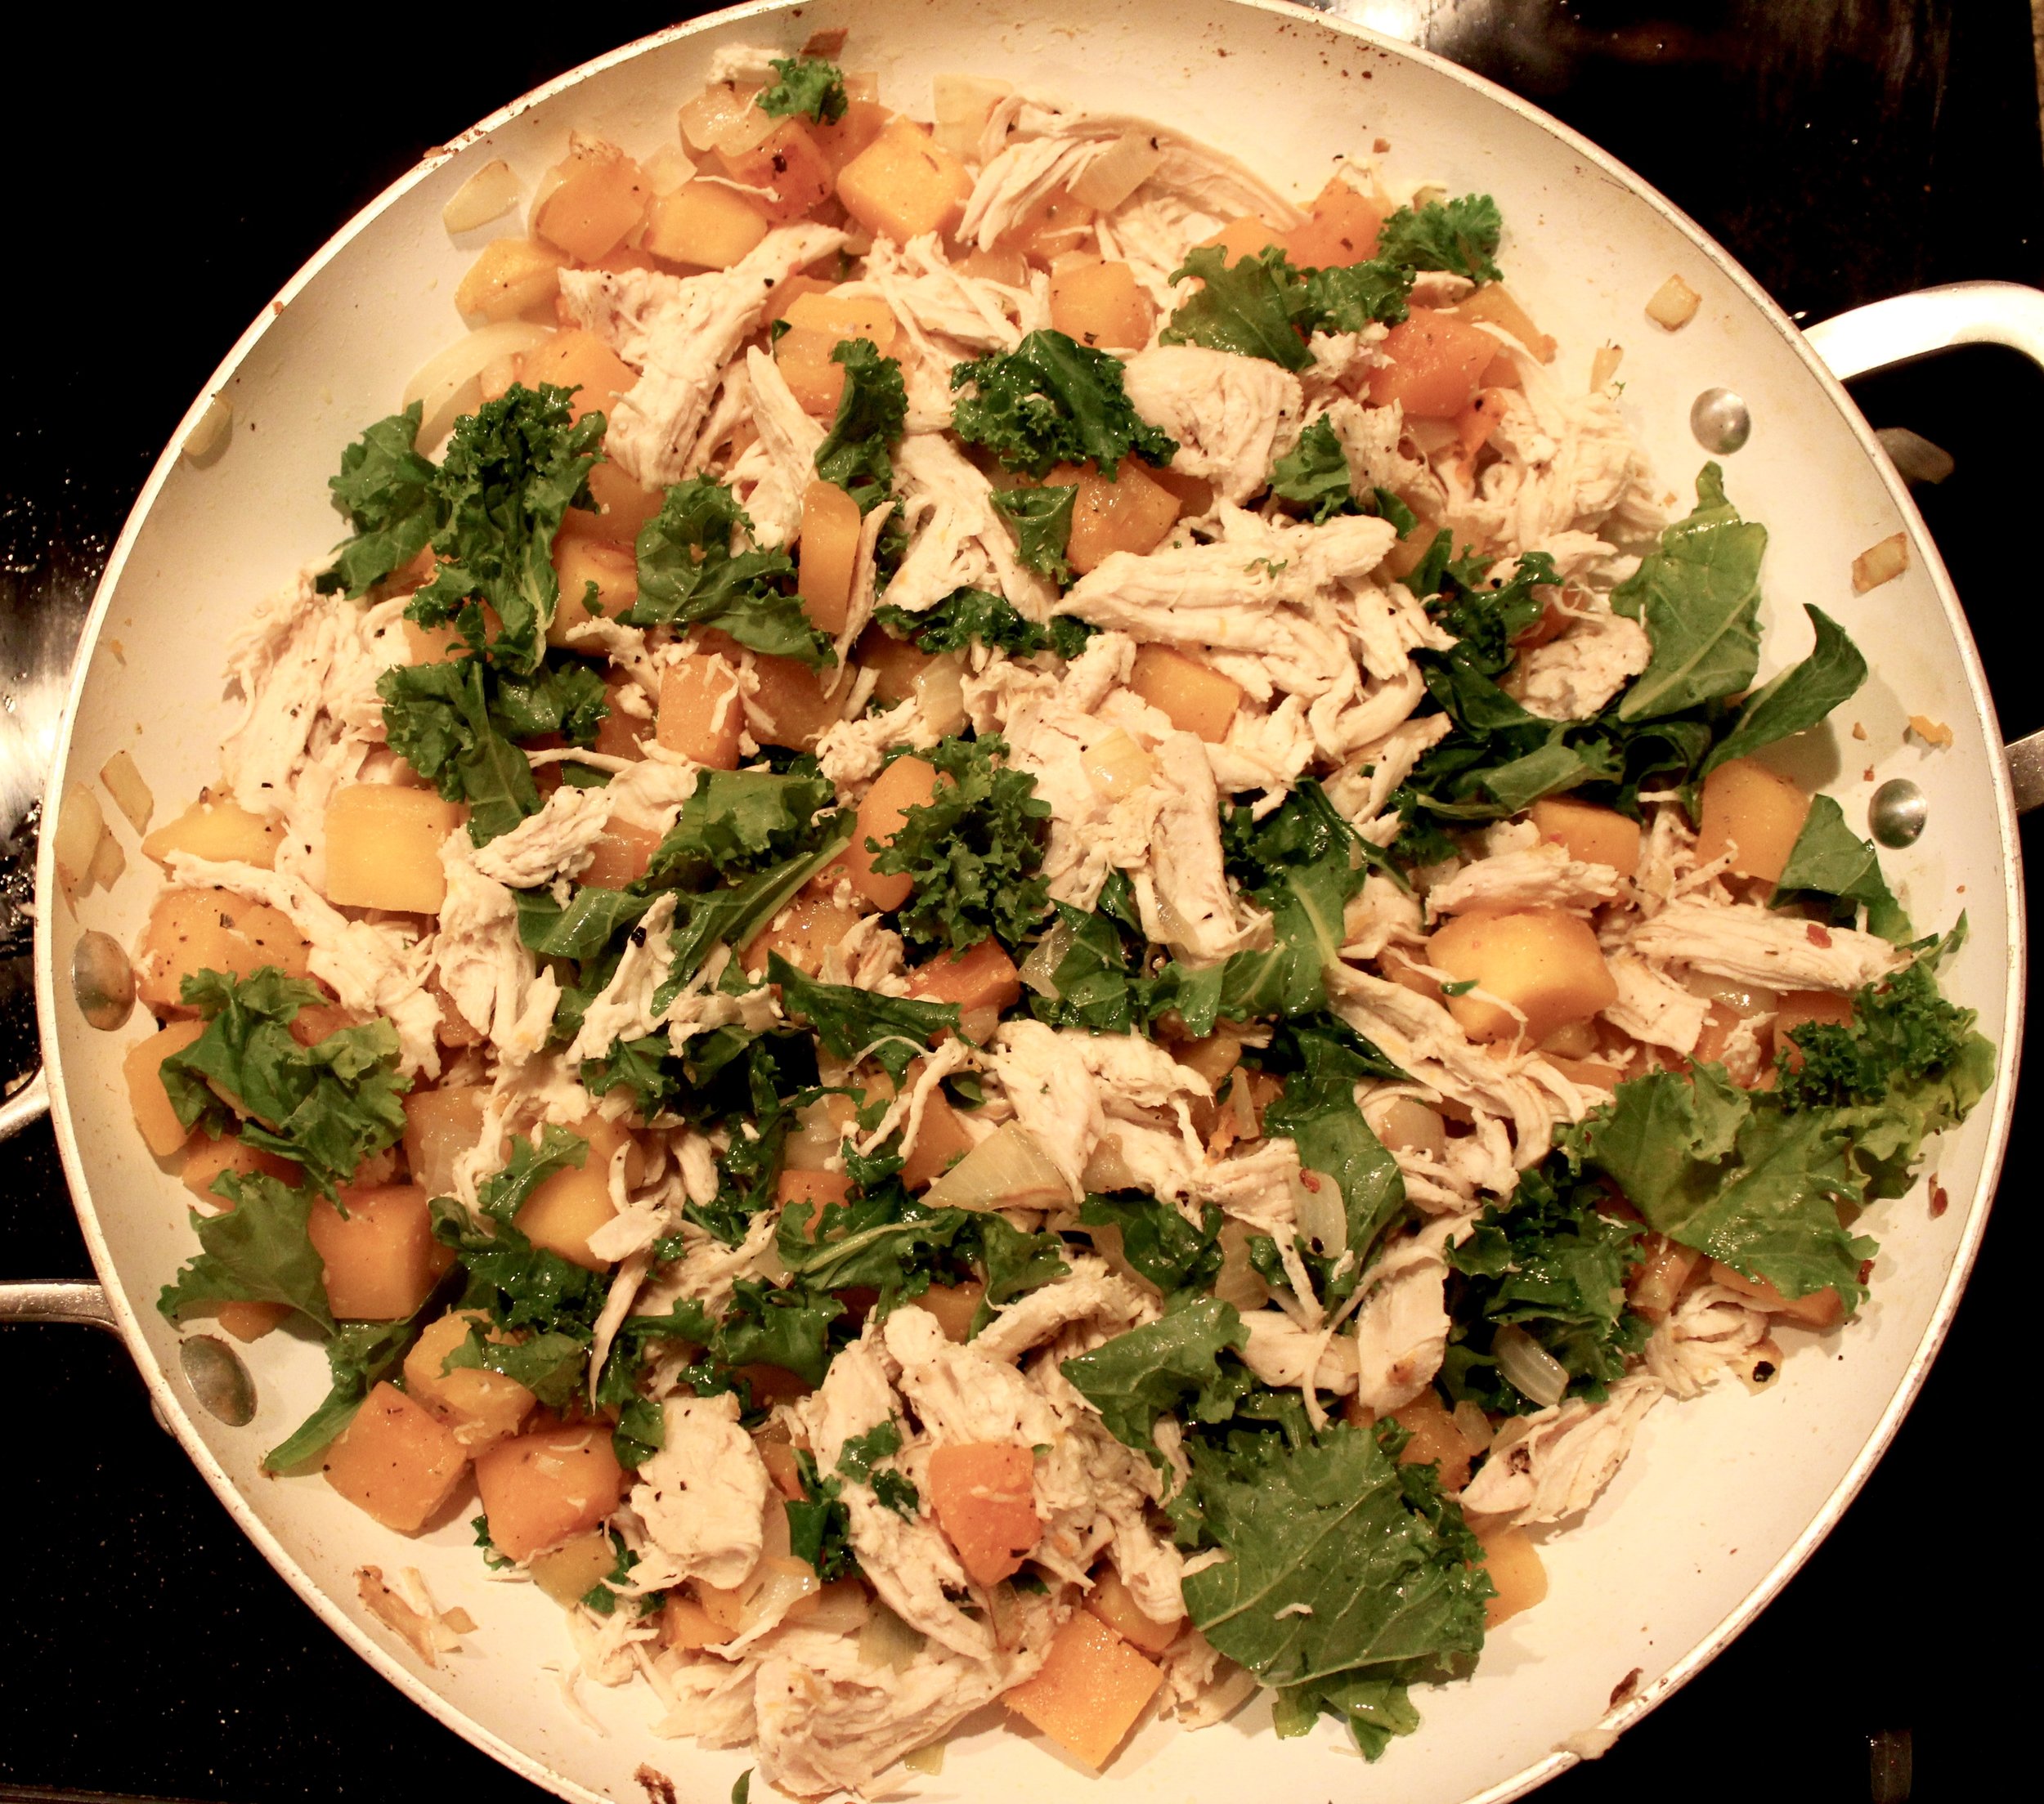
Once your squash and onions are soft, add your shredded chicken and kale. Season liberally at this stage as well. I again will do the usual S&P with garlic powder and some smoked paprika. The goal at this step is to just incorporate your chicken and gently wilt the kale.
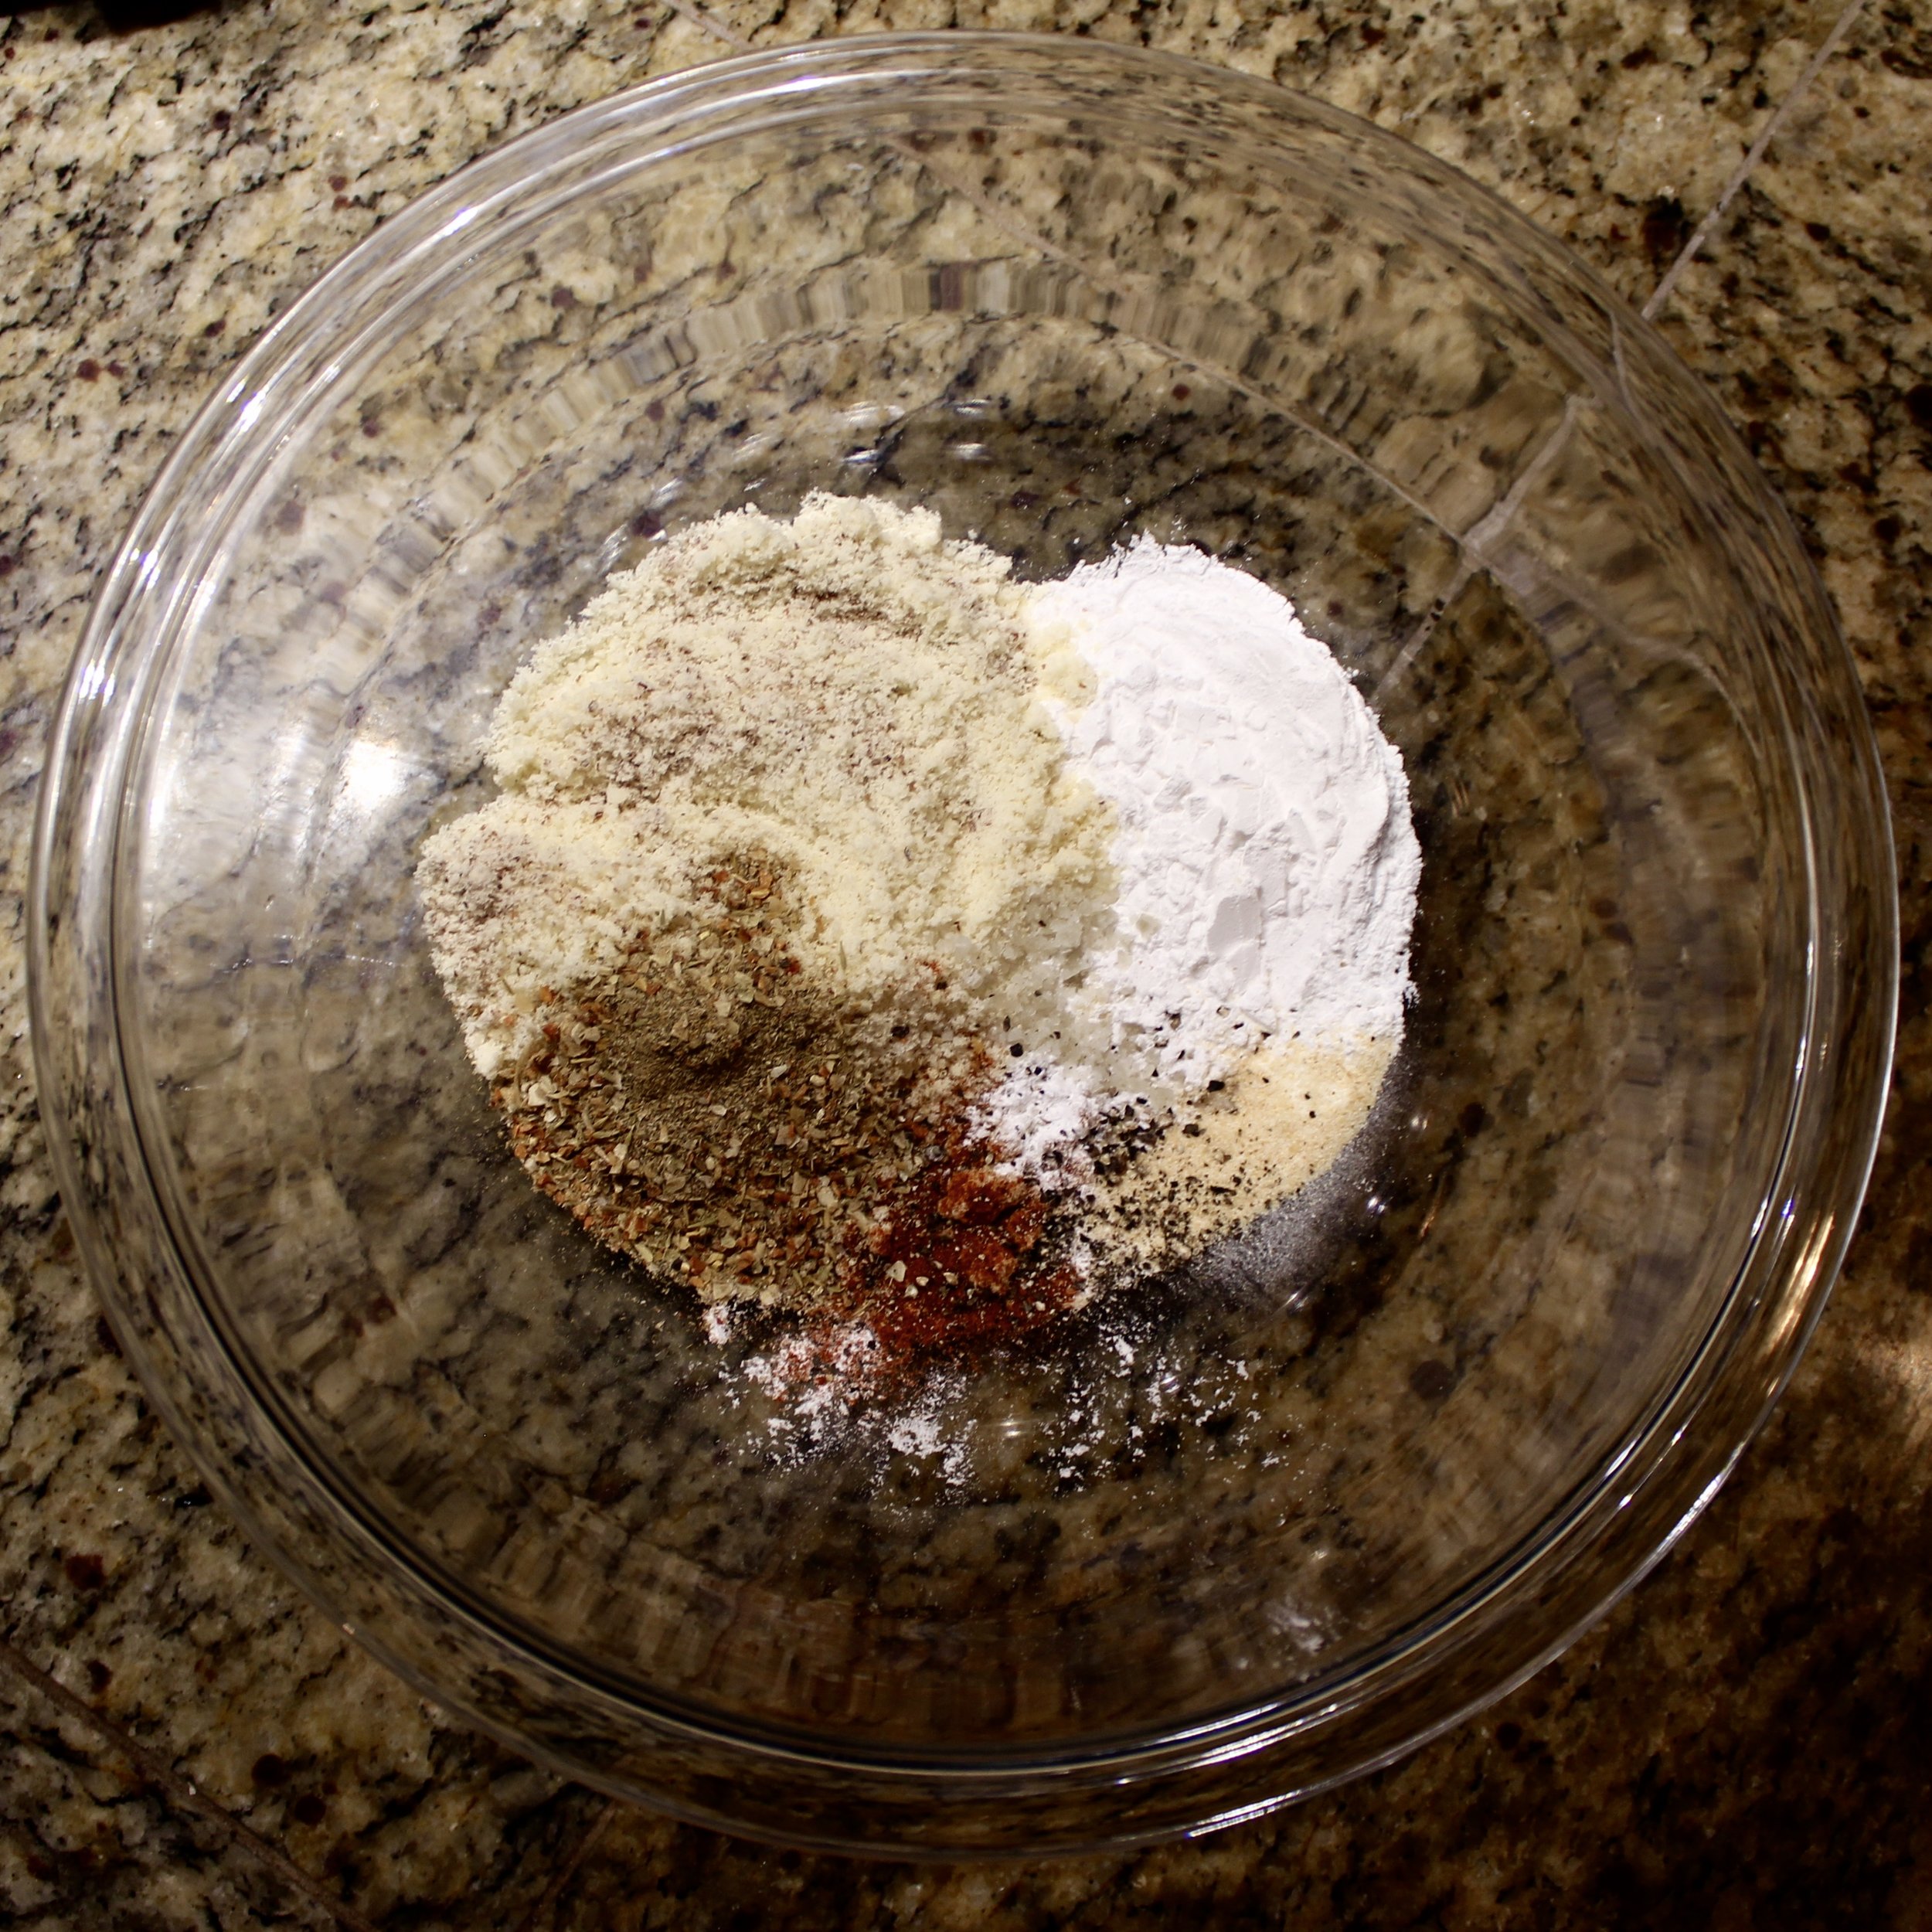
Next combine your almond meal, tapioca starch, garlic powder, smoked paprika, onion powder, salt and pepper in a medium size bowl.
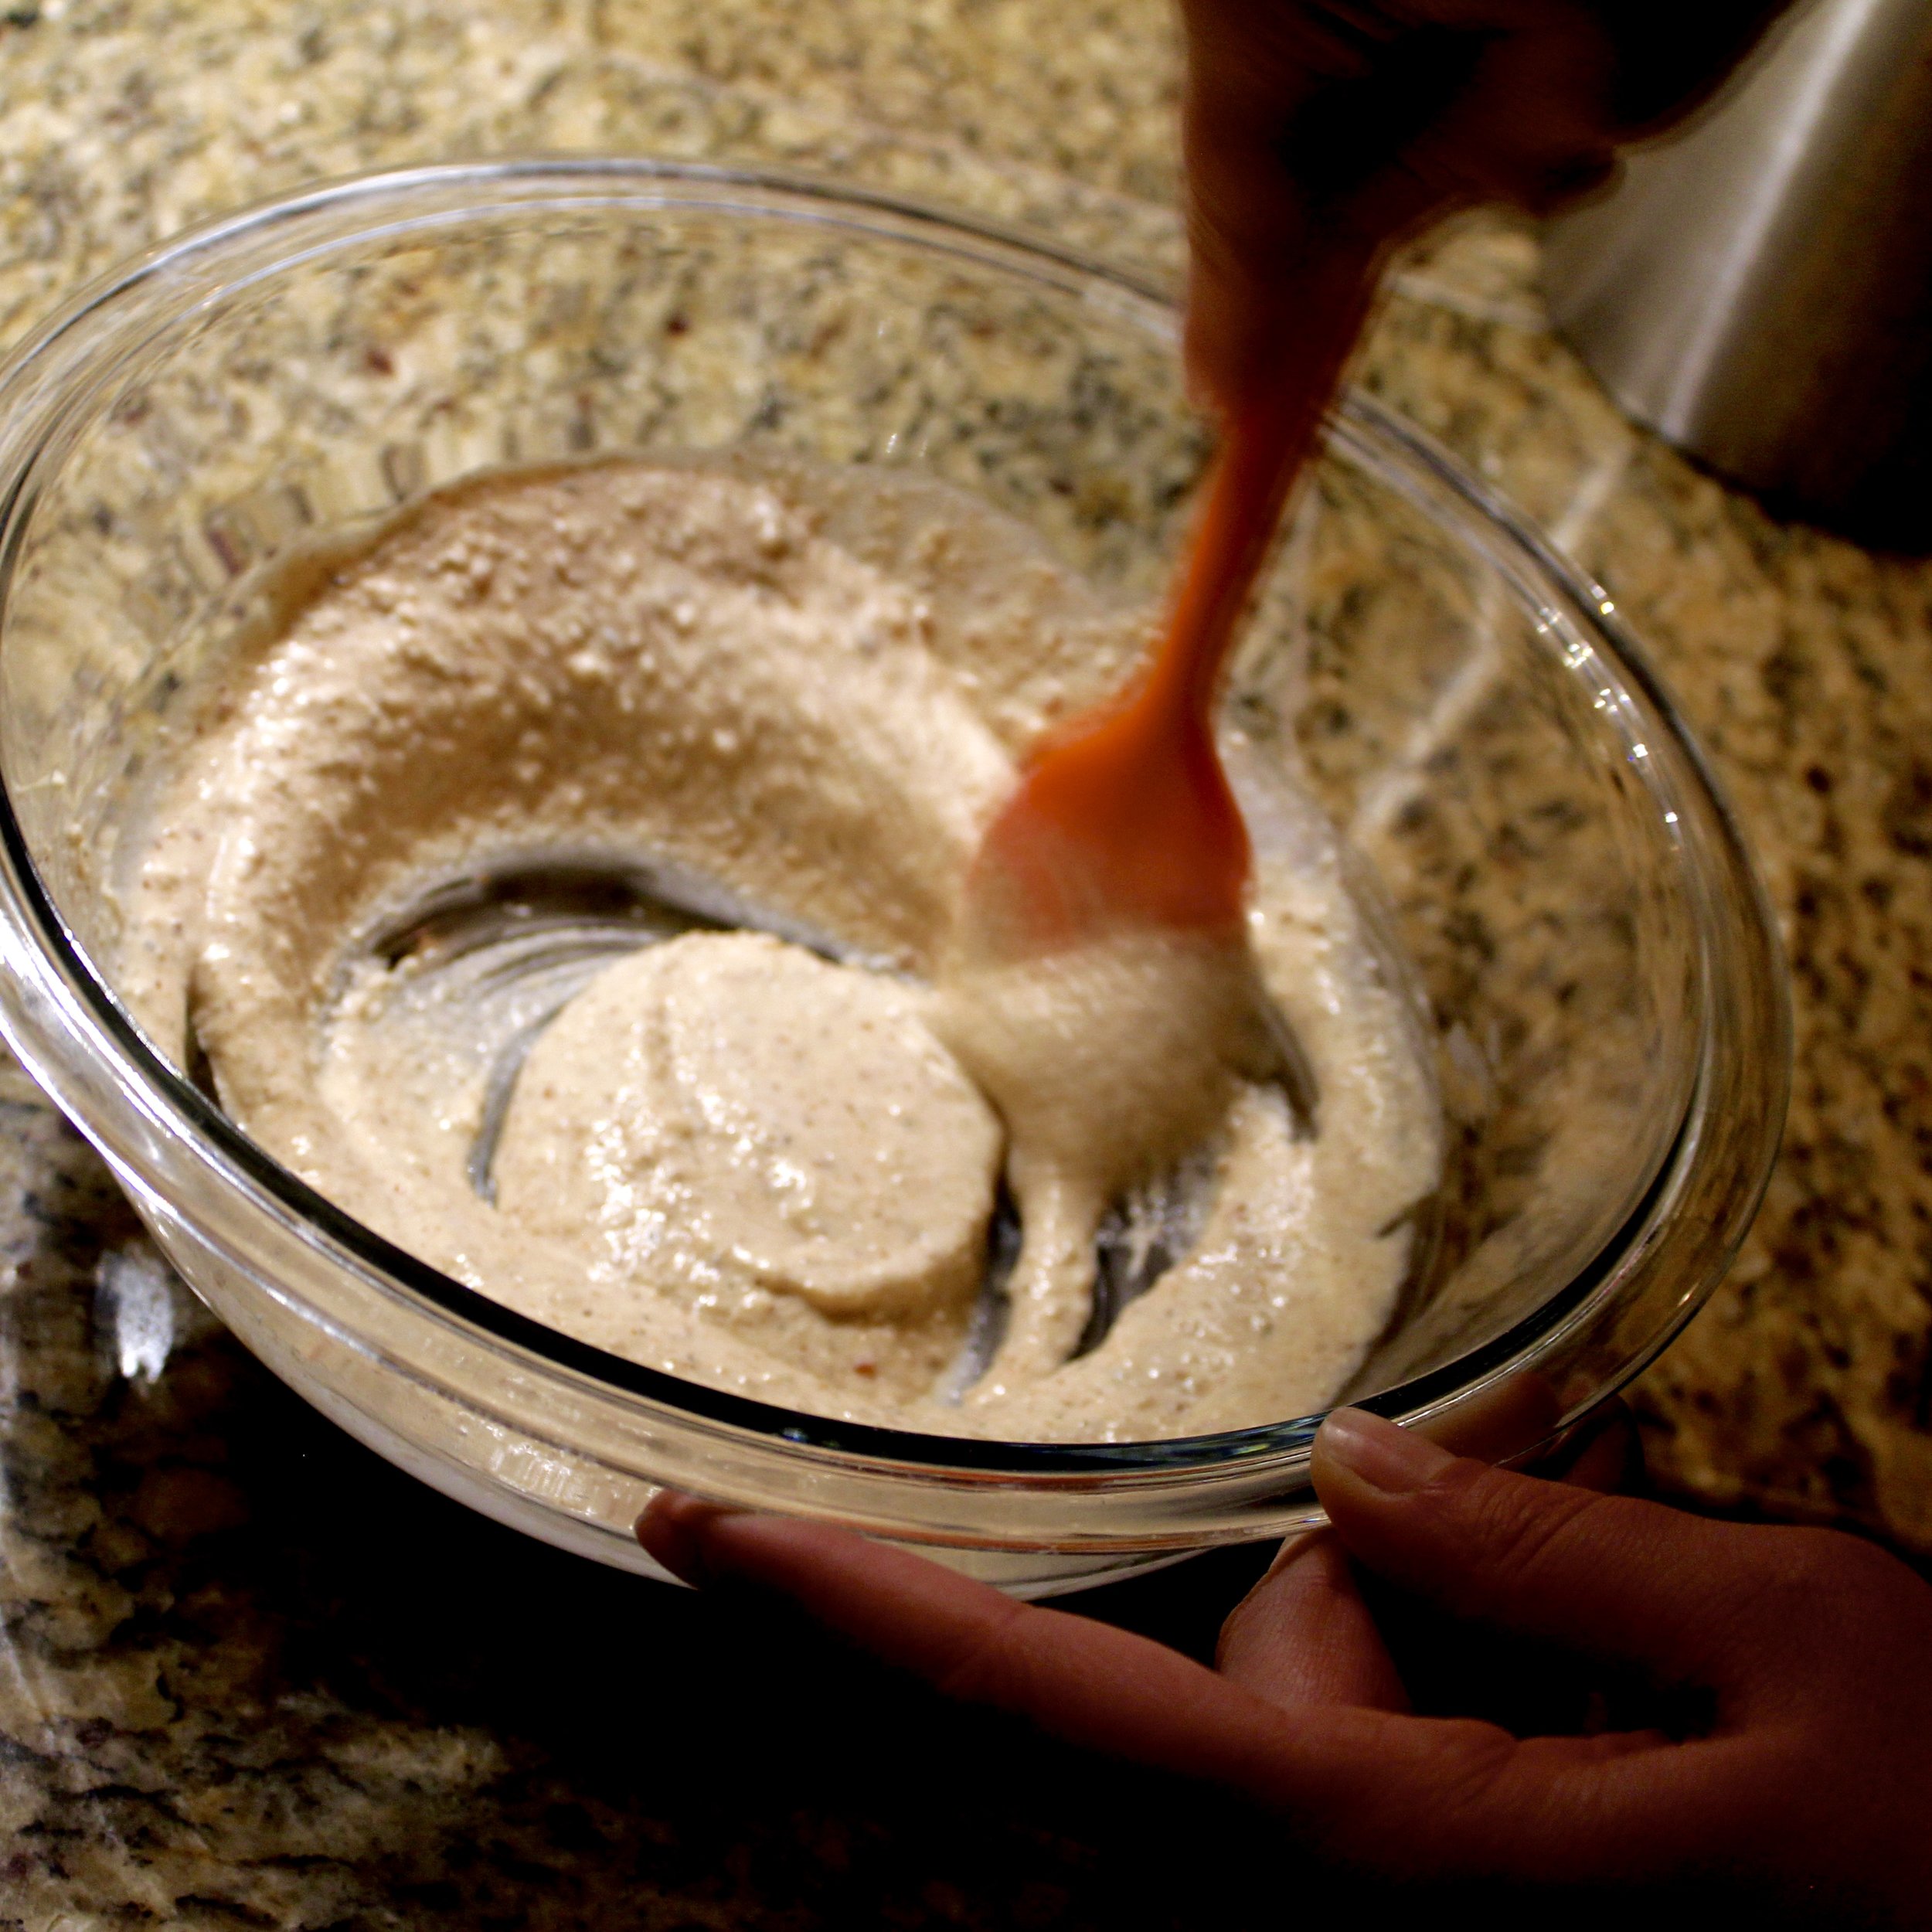
Slowly add your coconut milk until you reach a pancake batter consistency. You might have some chunks that don’t fully dissolve but they will blend better in the final product.
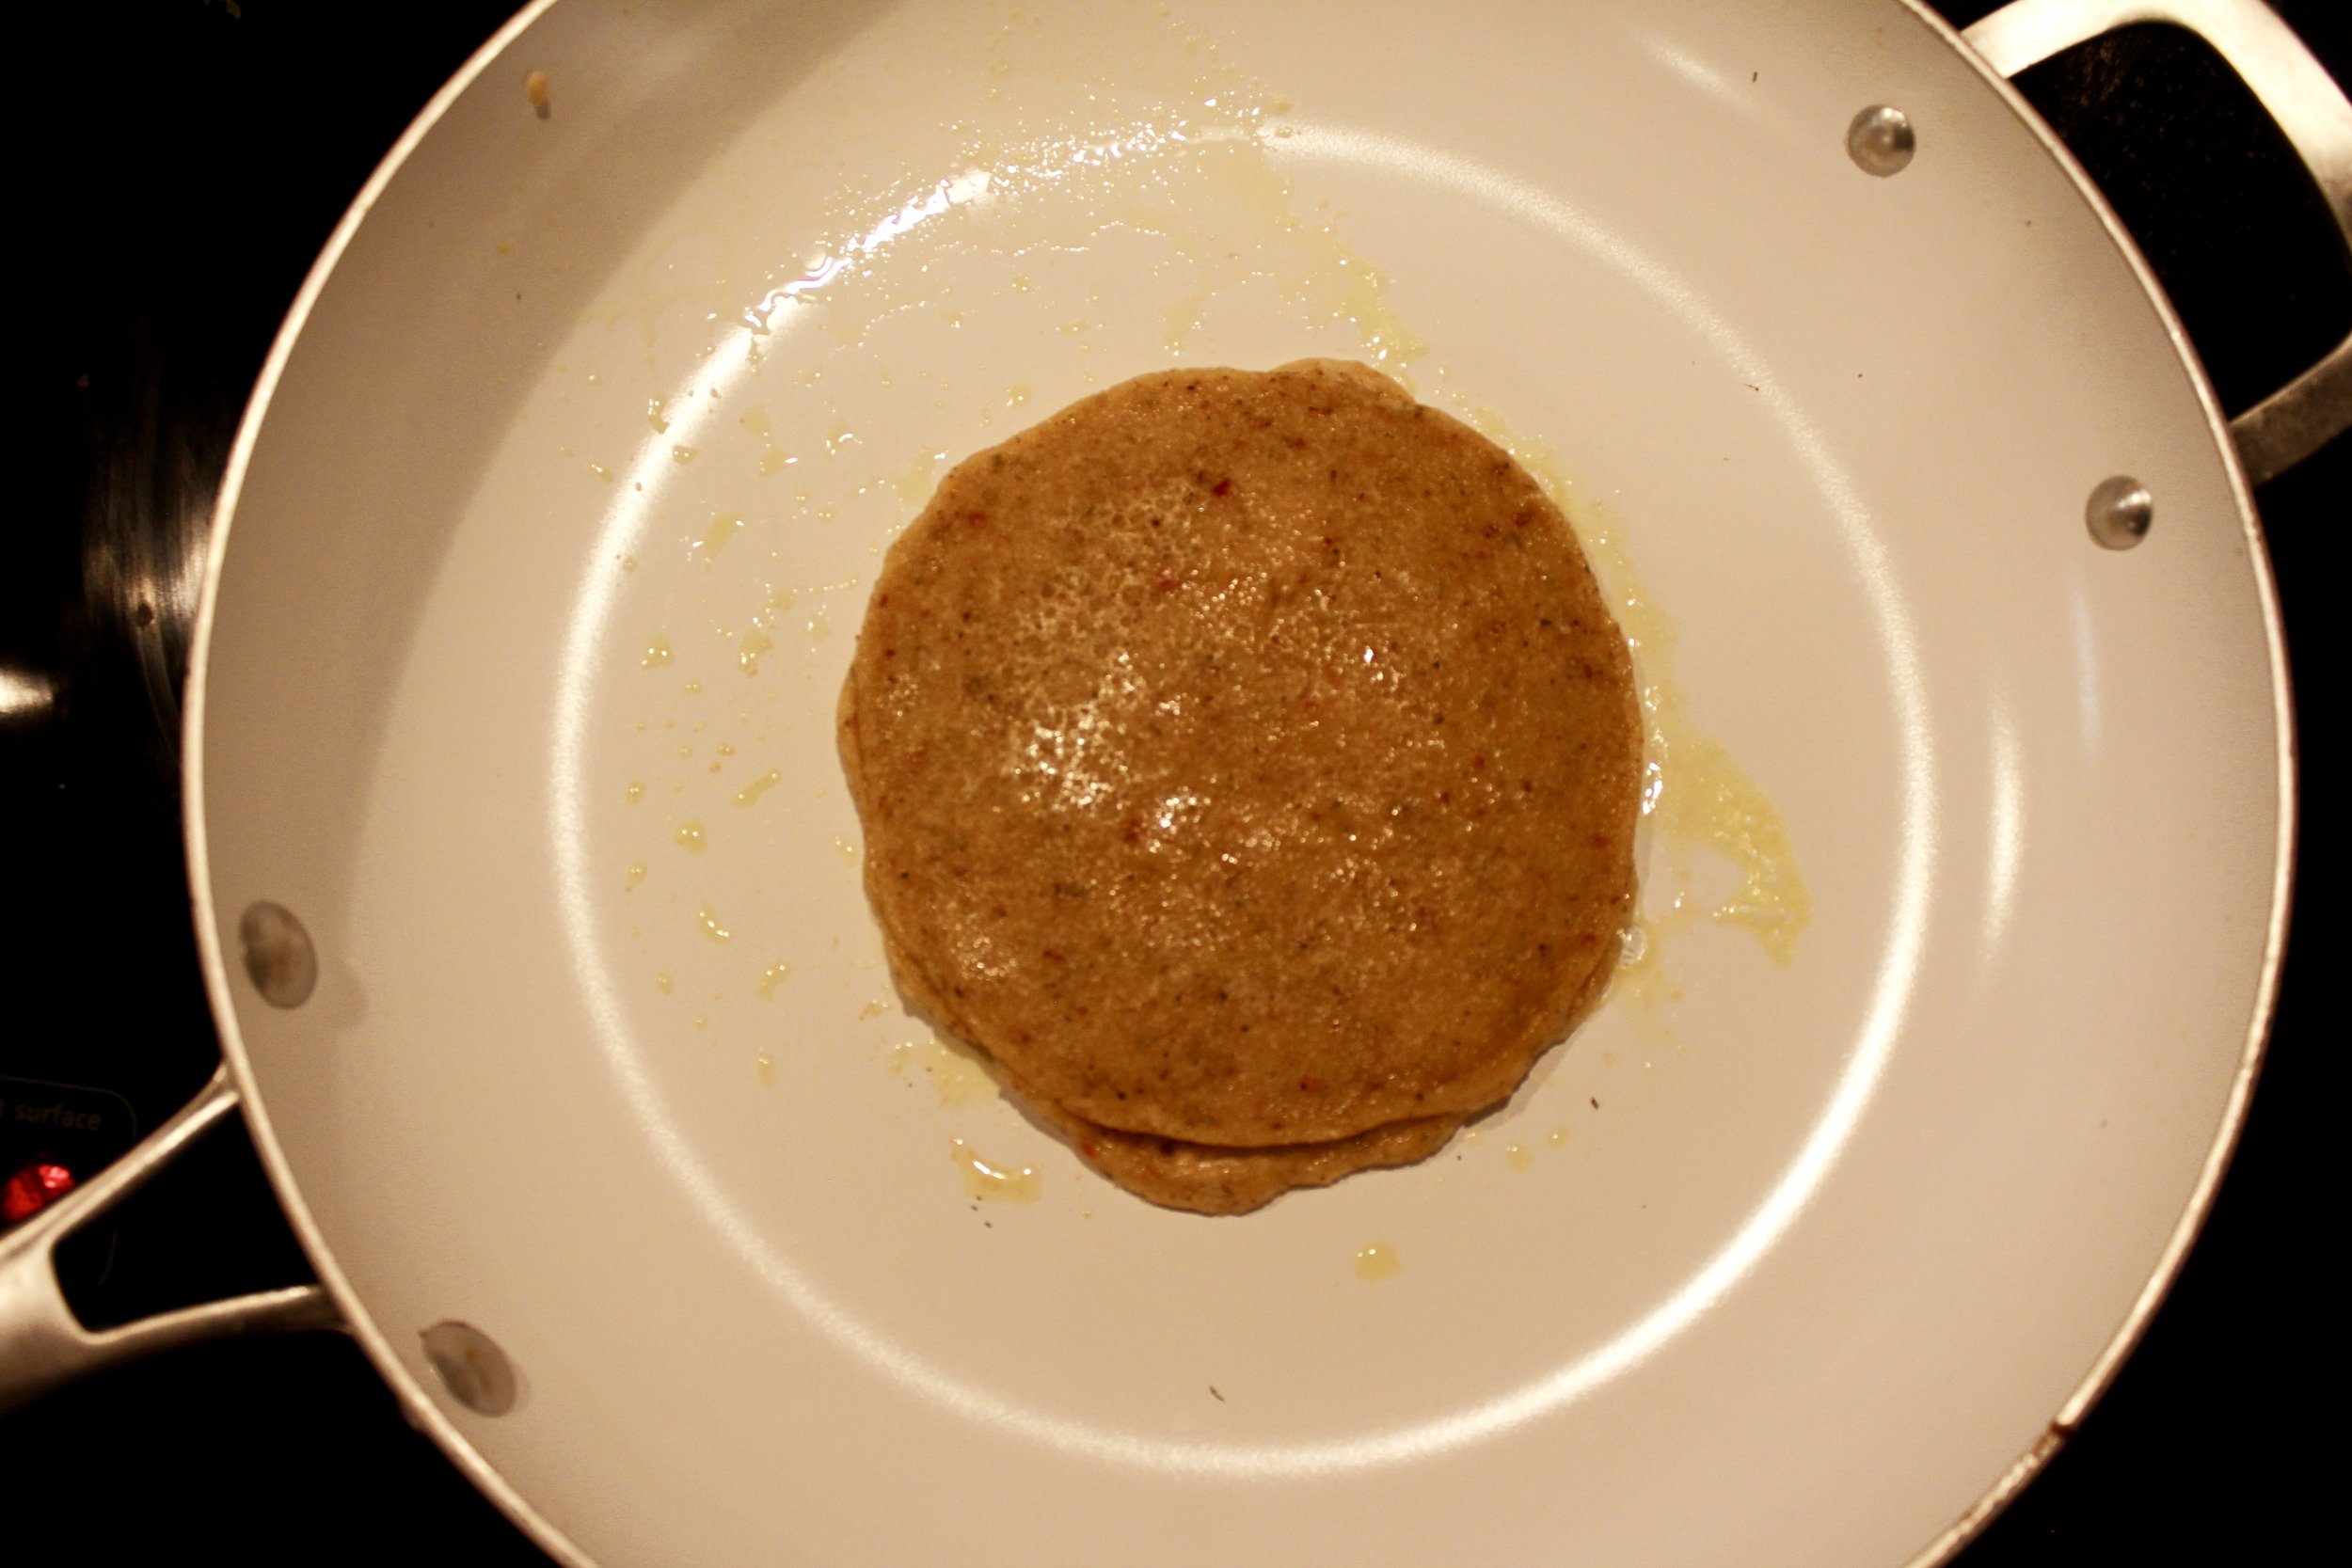
Here is the only step in which dairy is involved. I use butter on my non-stick pan simply because I prefer the taste and believe it adds to making that flaky consistency in the end. If you are avoiding dairy, swap coconut oil (or any other fat) at this stage and it works just as well! In order to make your empanada dough manageable to work with, we have to firm it up a tad on a frying pan. Unlike regular empanada dough that is much more dry and firm, we are working with pancake batter consistency.
Make sure your pan is heated to a little over medium heat. Pour about a cup’s worth of batter into the pan making sure to keep it thin. Once the edges are looking firm and brown, flip the dough over and leave for only a few seconds. This stage is only to make sure your batter holds together for the transfer to your cookie sheet. But maintaining a half raw dough will ensure you can manipulate the dough around your filling.
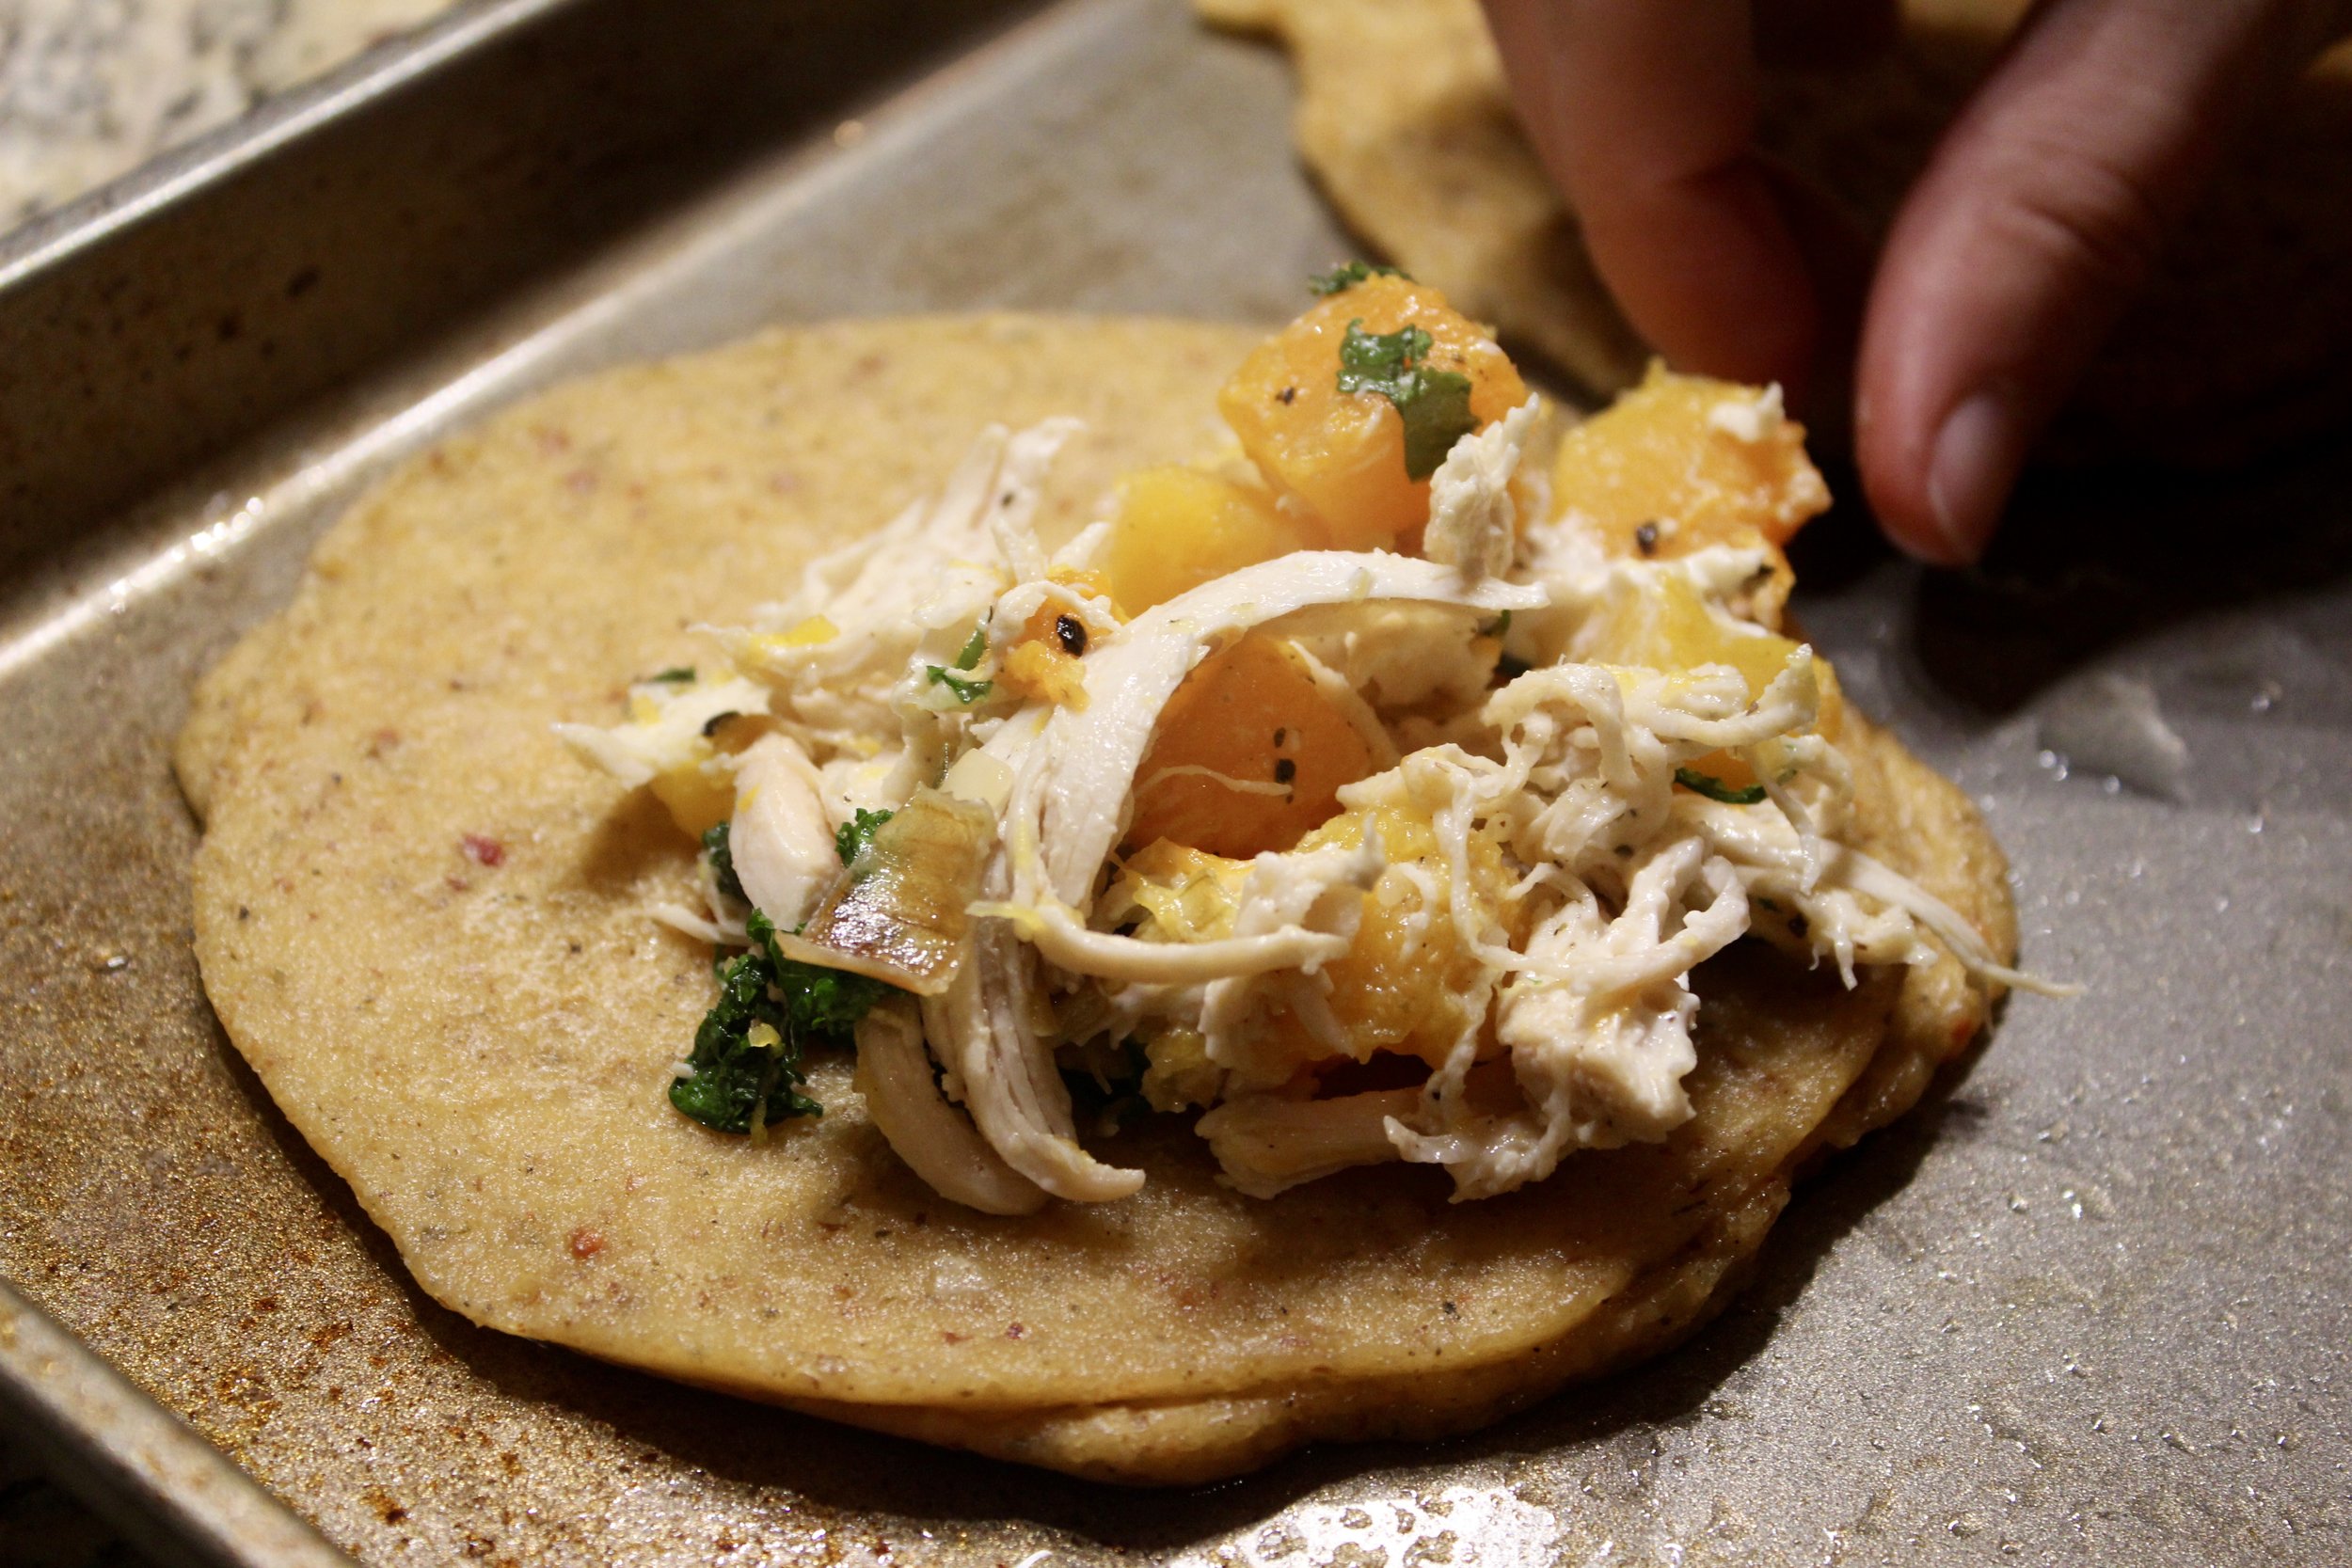
I tend to “over stuff” aiming for more filling over pretty presentation.
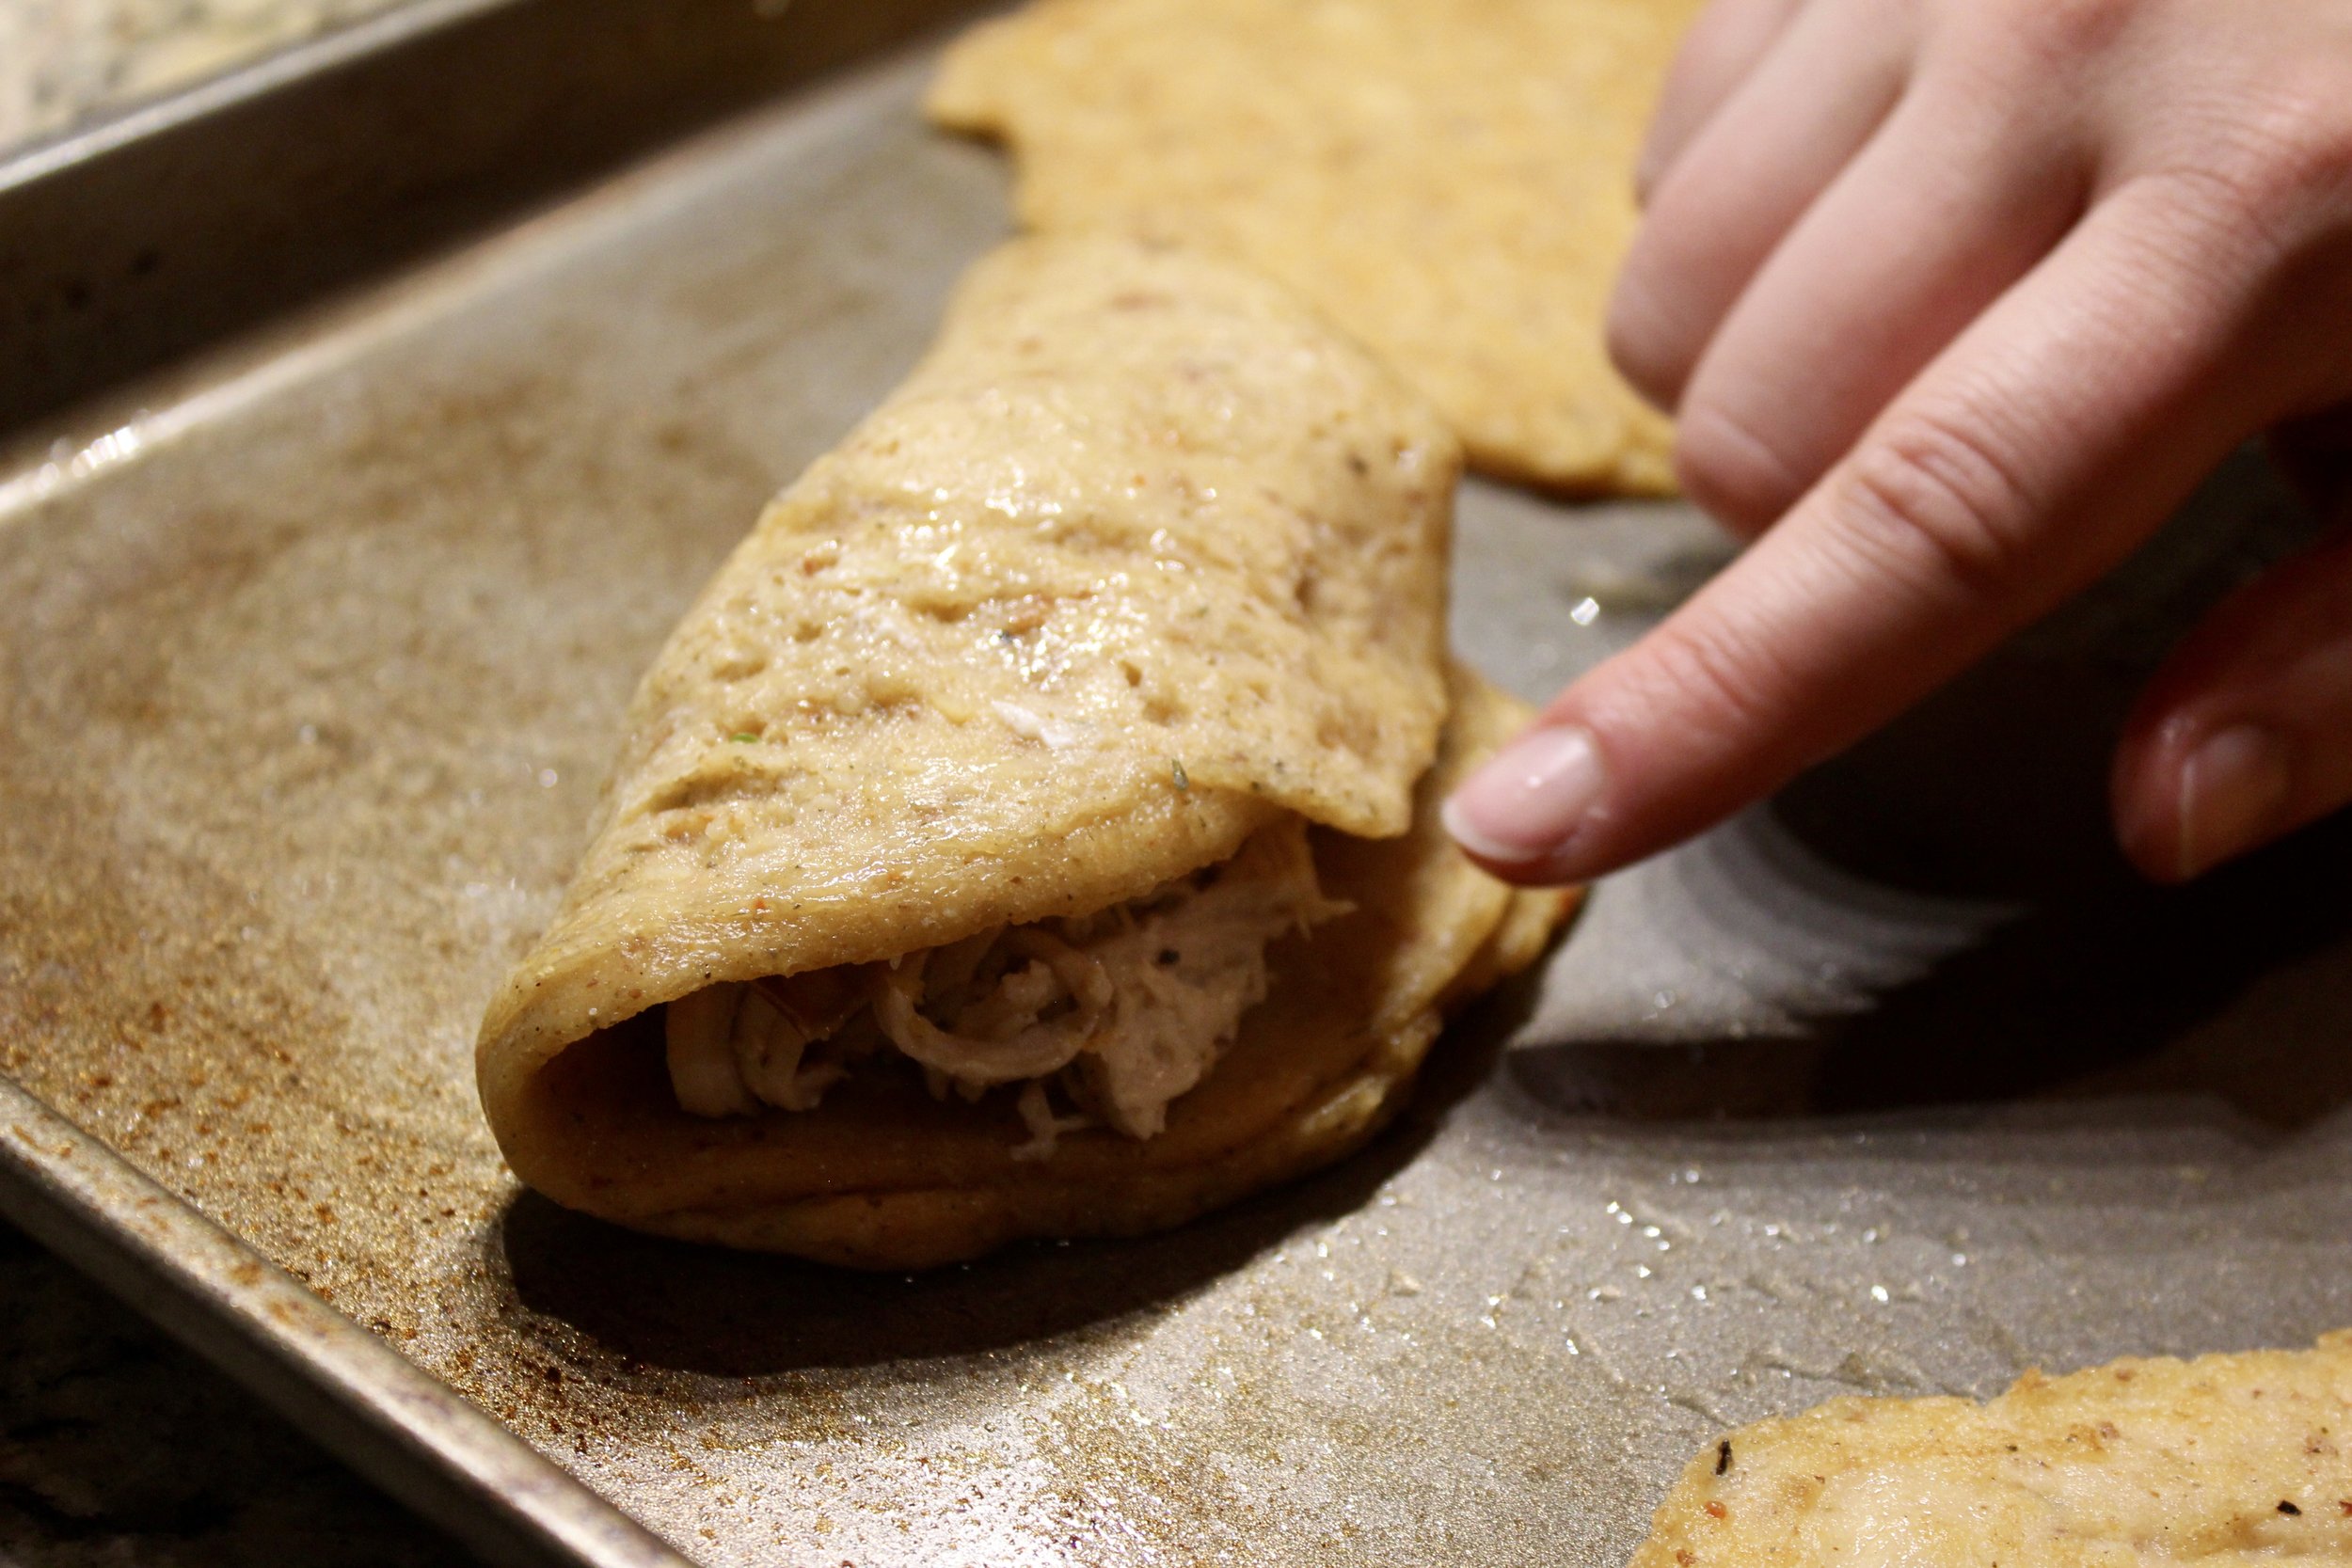
With half raw dough, it should be sticky enough to hold together! You can always use a little drop of water or egg wash to help seal your empanada. Since we are not frying these delightful pockets, they stay right there on your cookie sheet for the final cook.

This recipe makes a lot more stuffing than I usually can fit into the empanadas, but I am usually doubling my dough anyway for leftover empanadas! I also add goat cheese once I remove the stuffing from the stove top! If you can, goat cheese truly makes this dish!

Hopefully you’ll enjoy these as much as our house does. This is, by far, my husband’s most requested meal. He also can be credited with the awesome photog skills above.
Ingredients:
- 1 small butternut squash, peeled and cubed
- 1 medium sweet onion
- 2 cloves garlic
- 2 sprigs of thyme
- 3 cups of cooked and shredded chicken
- 3 cups of chopped kale
- salt/pepper
- 2 tsp garlic powder distributed in mixture and dough (+more to taste)
- 1 tsp smoked paprika (+more to taste)
- 1 tsp onion powder
- 2 Tbsp grassfed butter (or coconut oil etc.)
- 1 cup almond meal
- 1 cup tapioca starch
- 1 1/2 to 2 cups coconut milk, canned and full fat
*Optional: 1 small log of goat cheese
Preheat oven to 350 degrees
- Over medium-high heat, saute butternut squash and onion in butter (or fat of choice) until softened and onion is translucent. Add salt and pepper to taste.
- Add garlic and thyme and cook for an additional 1 to 2 minutes, until fragrant.
- Add chicken and kale to the pan and mix well until kale is slightly wilted.
- Once well incorporated and kale is softened, remove from heat and fold in hand crumbled goat cheese, if you choose.
- Transfer mixture into a bowl and cover with aluminum to keep warm.
- Mix almond meal, tapioca starch and all seasonings together in a medium sized bowl.
- Slowly add the coconut milk until the consistency resembles pancake batter.
- Pour roughly one cup of the batter into a medium-high heat oiled pan. Flip once the outside of the batter becomes solid and almost brown. After flipping, only leave on pan for a couple of seconds (don’t walk away!). The goal is to only make sure the dough is solid enough to transfer to an oiled cookie sheet.
- Once the half raw dough is on an oiled cookie sheet, fill each empanada with the chicken mixture and fold the dough over the top to seal. Having half-raw dough will enable you to manipulate the dough around the mixture and seal it shut. Wet fingers also help in sealing your empanadas.
- Once you have made all of your anti-inflammatory empanadas, put them in the oven and cook for 30 to 40 minutes.
- Enjoy!


add a comment
+ COMMENTS